
|
Metal Slug 6 is the first game of the main series to not be developed with the Neo Geo hardware. It was instead created with Atomiswave, allowing the development team to use new features previously unavailable on Neo Geo (like increasing the size of sprites to rotate them). |
The problem now is that there's very few way to rip these sprites effectively, due the limited documentation on the hardware.
There are 2 ways to rip MS6's graphics: use one of Dolphin's tools to rip the graphics of Metal Slug Anthology or
use TiledGGD to rip graphics from PCSX2 savestates
of Metal Slug 6 (thanks to Ragey for the full tutorial!).


Dolphin is a Wii / Gamecube emulator with tons of useful features in it. One of them is "Dump Textures" (located
under "Graphics/Advanced"), a ripping tool specialized in dumping textures from any Wii or Gamecube game. In this case, we'll be needing an .iso of Metal Slug Anthology to do that.
Once the box ticked, Dolphin is going to rip every texture featured on-screen while you play, and will dump them
inside a folder named after the .iso's ID. The folder in question is located under the local directory "Dump/Textures/(Game's ID)".
This tool can rip hidden off-screen content, but unfortunately not the unused ones. You'll only be able to find snippets
of them implemented directly into some of the dumped .pngs. But here's the kicker: the palettes of the sprites are
already applied! No need to find and/or recolor them through a palette viewer anymore!
Since you're ripping from Metal Slug Anthology, you can also rip the sprites from the other 6 games if you want.
The dumped sprites of MS6 will appear as either 64x64 or 256x256 pixels wide .png, while the ones from the other 6
games will appear as 8x8 or 128x128 pixels wide .png.


The tiles are ordered horizontally, meaning that you'll have to piece them back from left to right.
And unlike the first 5 Metal Slug games, Metal Slug 6's sprite can always be pieced back correctly without any
references!
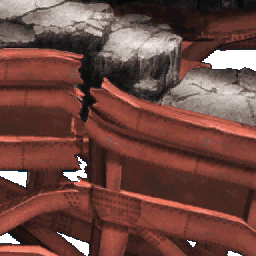
MS6 now uses pre-rendered backgrounds (much like Donkey Kong Country or Final Fantasy VII), meaning that the
dumped textures are in 256x256 pixels wide .pngs that you need to piece back.

TiledGGD is an universal tile-viewing program, capable of viewing any tiles of any game. The pre-configurations
change depending on the game, so setting up correctly the program without help can prove to be a difficult task.
To get these savestates, you'll need an .iso of Metal Slug 6 for the PS2 and the PCSX2 emulator (although you may want to
check a tutorial on how to set it up).
Once you've got all that, you can just play the game and save when the stuff you want to rip is loaded in (for example, I'll save
my game in the sewer system of mission 3 to rip the Flying Core).
Now you can grab your savestate in .p2s format under "PCSX2/sstates"
and unpack it via an unzipping program. You only need rip the "eeMemory.bin" file and then import it in TiledGGD.

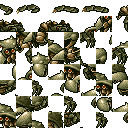
At first the result will look like this. Don't worry, this is completely normal!
Now we need to get the configurations changed for it to work. There's 2 different setups to rip the graphics: one for
the regular sprites and one for the 128x128 graphics (backgrounds, some entities, etc.).
![]()
- Set the "Tile Size" to "16x16"
- Change the "Mode" to "Tiled"
Now expand the canvas by using the keyboard arrow keys.
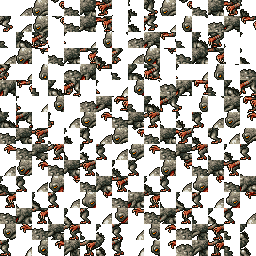
Still looks like nothing, but we're getting there. After you've set the canvas size to your preferences, set the Skip Size
(located under "Image/Skip size") to a suited unit to scroll through
the graphics (I recommend "(Height) Rows"). Now you can scroll by
pressing the PgUp and PgDown keys on your keyboard.
![]()
Here are the sprites! However it's not easy to find the palettes with TiledGGD, but you can still try by scroll through
different colors with the Home and End keys. Still, it's easier to simply recolor the ripped sprites by using
the dumped textures from Dolphin.

- Change the format to 8BPP
- Set the "Tile Size" to "128x128"
- Change the palette format to 4BPP
- Expand the canvas' size
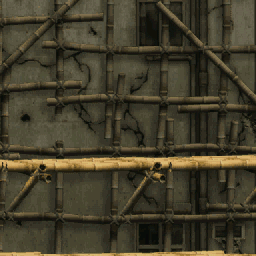
- Scroll until the BG parts are visible

The palettes seem to be stored right above the tiles, but I couldn't find them for this example. Though you can still
give it a shot and scroll through the palette viewer, you might have better luck than me!
