
|
The Shot factory |
This page will guide you on how to rip
sprites from the first 6 Metal Slugs on NEO-GEO, so
that you can use them for projects, help some friends or even helping the sprite ripping
community by posting sheets of them online. |
(Most of this info comes from personal experience and great help from long-time ripper Ragey. Also go and check his Debug Menu page, as it will greatly help you rip stuff by via the use of cheats, direct access to stages, etc.


The Shot factory (located under "Tools/Shot factory") is the first of the 2 ripping tools within Kawaks, allowing you
to remove the different layers of sprites.
This tool is extremely useful to know the positions of each frames of an animation like the explosion ones, where it's
really hard to correctly place the frames without any references. But it's also very useful to rip environmental stuff
and the backgrounds!
Once the tool is selected, the screen will freeze and you'll be given this window of command:
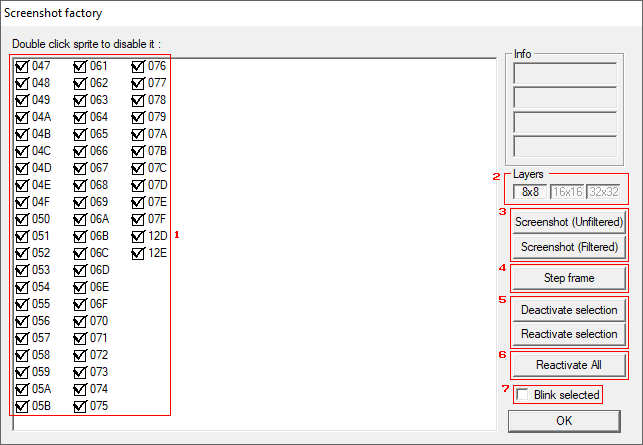
- All the graphics featured on-screen (except from the ones within the HUD)
- Activates or deactivates the HUD
- Screenshots the screen (there's no difference between the two options)
- Makes the game advance 1 frame
- Shows or hides the selected sprites
- Shows all of the hidden/deactivated sprites
- Blinks the currently selected sprite(s) on the screen
And here's a few examples of what the tool can do:
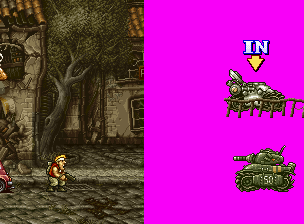
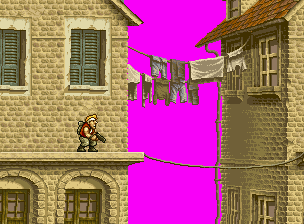
Metal Slug / Metal Slug X
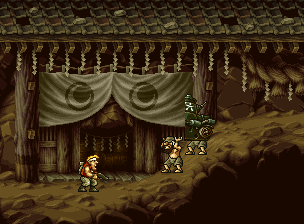
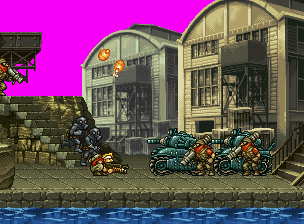
Metal Slug 3 / Metal Slug 5
The screenshots you take will be stored under the following directory "WinKawaks/capture".

The Tileviewer (located under "Tools/Tileviewer") is the second ripping tool of Kawaks. As the name suggests, it
allows you to view the tiles of graphics from the currently loaded game. This is also where you'll find all the unused stuff.
Once selected, the screen will display the tiles and you'll be given this window of command:
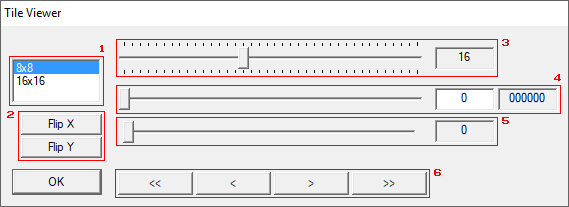
- Changes between the 8x8 section (HUD stuff, like letters) and the 16x16 one (all the rest)
- Flips the X and Y axis of the tiles (only useful for extremely rare occasions)
- Changes the number of rows of sprites for 8x8 and the number of tiles per row for 16x16
- Scrolls through the tiles of graphics, vertically for 8x8 and horizontally for 16x16
- Scrolls through the color palettes by applying them to the graphics
- Same function as 4, but you can locate sprites more precisely by scrolling row by row
And here's a few snippets of the tileviewer in action:
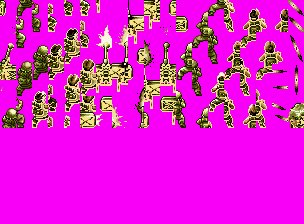
Metal Slug / Metal Slug X
Metal Slug 3 / Metal Slug 5

This tool has a lot of quirks to take into account, so here is a non-exhaustive list of them:
- Once you close the window of commands, you'll lose all configurations set up upon reopening it. So think twice before pressing the "OK" button!
- Unlike the Shot Factory, there is no screenshot command available. So you'll have to use the 'Print Scr' key or use a screenshot program to save the displayed tiles.
- I suggest having the sprite(s) you want to rip on-screen before opening the Tileviewer, just to make sure that the Tileviewer will save that palette for you to find.
- The palette you are searching for can usually be found within the first 195 color palettes.
- You can always almost always rip sprites with an incorrect color palette and apply the correct one afterwards using your image editor.
- If you want to rip lots of sprites in several goes, you can write down their coordinates and input them on the right.

The areas 3: D T_5 and E T_6 are test stages exclusive to Metal Slug 5 and only accessible via the debug menu.
Their main purpose are to test the animations of the characters, enemies and misc. in the game, including unused
ones. While they are not official tools, they are still largely helpful in terms of sprite ripping if combined with the Shot
factory.
As said earlier, you can check Ragey's site to learn how to access the debug menu in order to play these stages.
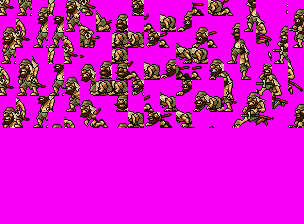
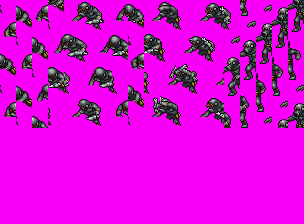
So a bit more details on these stages: D T_5 transport you to a stage where you can view each
frame from each animation from each entity programmed, while E T_6 shows you fully animated versions of these said frames.

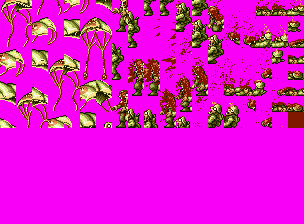
D T_5 / E T_6
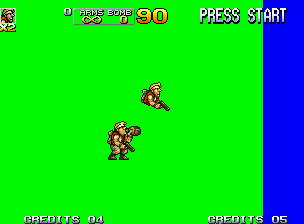
As you can see, you are also provided with a bright-colored background to more easily view the sprites. You can also
change the color by walking to the right.
Each areas have their own commands to change the frames, entities, etc. Although you aren't given any command
box. Instead, you have to use the keys you use to play!

 : Changes to the next frame of the animation of the sprite
 : Changes to the previous frame of the animation of the sprite
 : Changes to the next sprite
 : Changes to the previous sprite

- : Changes to the next animation of the sprite
- : Changes to the previous animation of the sprite
- : Changes to the next sprite
- : Changes to the previous sprite
